BUSINESS
From Concept to Shelf: The Essential Steps in Food Packaging Design

Food packaging plays a crucial role in the success of a product. It not only protects and preserves the food but also serves as a marketing tool and a means of communication with consumers. From initial concept to final shelf placement, the process of designing food packaging involves several key steps, each crucial to ensuring the product’s success. Here’s a comprehensive guide to navigating the essential stages of food packaging design.
1. Understanding the Product and Market
The first step in packaging design is gaining a thorough understanding of the product and its market. This involves:
Product Analysis:
Assess the nature of the food product. Is it perishable or non-perishable? Does it require special storage conditions? The packaging must address these needs to ensure product integrity and safety.
Target Audience:
Identify the target consumer. Understanding their preferences, purchasing behavior, and expectations will guide design decisions. For example, packaging for a luxury chocolate brand will differ significantly from that of a budget-friendly snack.
Market Research:
Analyze competitors’ packaging. What works well? What can be improved? This research helps to identify trends and gaps in the market, providing insights for differentiation.
2. Defining Packaging Objectives
Once you have a clear understanding of the product and market, establish the objectives of the packaging. Consider:
Functionality:
The packaging must protect the food, extend its shelf life, and be convenient for consumers. Consider features like resealability, ease of opening, and portion control.
Branding:
Packaging should reflect the brand’s identity and values. This includes color schemes, logos, and overall design aesthetic. Consistent branding across packaging helps build brand recognition and loyalty.
Regulatory Compliance:
Ensure that the packaging meets all legal requirements for food safety, labeling, and environmental regulations. This includes nutritional information, ingredient lists, and allergen warnings.
3. Design Concept Development
With objectives in mind, start developing design concepts. This phase involves:
Brainstorming:
Generate a range of ideas and concepts. Focus on visual appeal, usability, and alignment with brand identity. Sketch initial designs and explore different materials and structures.
Material Selection:
Select materials that are appropriate for your food product and support your sustainability objectives. Options often include plastic, glass, metal, and paperboard. For instance, High Impact Polystyrene (HIPS) plastic is a popular choice due to its durability and cost-effectiveness. When choosing materials, evaluate factors such as cost, durability, and environmental impact.
Prototype Creation:
Develop prototypes to test design concepts. This allows you to evaluate the look and feel of the packaging, as well as its functionality. Make adjustments based on feedback and testing results.
4. Design Refinement and Testing
Refine the chosen design and conduct thorough testing:
Consumer Testing:
Gather feedback from potential consumers. This can be done through focus groups, surveys, or in-store tests. Assess their reactions to the design, functionality, and overall appeal.
Shelf-Life Testing:
Ensure the packaging maintains the food’s quality throughout its intended shelf life. Test for factors like moisture, oxygen, and light exposure to ensure the packaging effectively preserves the product.
Compliance Testing:
Verify that the packaging meets all regulatory standards. This includes checking for accurate labeling, proper material use, and adherence to safety regulations.
5. Production and Quality Control
Once the design is finalized, move to the production phase:
Manufacturing:
Partner with a reliable packaging manufacturer to produce the final packaging. Ensure that they can produce the packaging consistently and meet quality standards.
Quality Control:
Implement strict quality control measures to ensure the packaging meets specifications. Regularly inspect samples from production runs to catch any defects or inconsistencies.
6. Marketing and Distribution
With packaging in hand, focus on marketing and distribution:
Marketing Strategy:
Develop a marketing strategy that highlights the packaging’s unique features and benefits. Utilize various channels such as social media, advertisements, and in-store promotions to attract consumers.
Distribution:
Plan the logistics of packaging distribution. Ensure that the packaging is compatible with storage and transportation requirements to maintain product integrity.
7. Post-Market Evaluation
After the product is on the shelf, continue to monitor its performance:
Consumer Feedback:
Collect and analyze feedback from consumers regarding the packaging. This can provide valuable insights for future improvements.
Sales Performance:
Track the sales performance of the product. Assess whether the packaging contributes to increased sales and consumer satisfaction.
Continuous Improvement:
Use feedback and performance data to make iterative improvements to the packaging. Stay adaptable to changing consumer preferences and market trends.
Conclusion
Designing food packaging involves a detailed and multifaceted process that encompasses everything from understanding the product and market to final production and distribution. By meticulously following each step, from concept to shelf, you can create packaging that not only protects and preserves your product but also appeals to consumers and strengthens your brand. The ultimate goal is to achieve a packaging solution that enhances the product’s value and contributes to its market success.
BUSINESS
XXXLutz: The Europe’s Furniture Giant

When it comes to finding stylish, affordable, and high-quality furniture, XXXLutz stands out as one of the leading retailers in Europe. Whether you’re furnishing a new home or updating your current space, understanding what XXXLutz offers can save you time, money, and stress. This article provides a comprehensive look at XXXLutz, exploring its history, product range, pricing strategies, and customer experience. By the end, you’ll know why this brand is a favorite among millions and how it compares to other top furniture retailers.
Introduction to XXXLutz: A European Furniture Powerhouse
The name XXXLutz resonates with quality furniture and home décor solutions across several European countries. Founded decades ago, this company has built a reputation for blending traditional craftsmanship with modern designs. It offers everything from sofas and dining sets to bedroom furniture and office accessories.
Starting the article with the focus keyword XXXLutz ensures immediate relevance for those searching for expert insights into this brand. From its affordable price points to its extensive selection, XXXLutz remains a reliable choice for consumers seeking value without compromising style.
The History and Growth of XXXLutz
XXXLutz was established in the mid-20th century and has since grown into one of Europe’s largest furniture retailers. Headquartered in Austria, the company expanded quickly through acquisitions and organic growth, entering markets in Germany, Switzerland, Czech Republic, and beyond.
Industry experts often cite XXXLutz’s strategic expansion as a key factor in its success. By integrating regional preferences and trends, the company tailors its offerings to a wide variety of tastes while maintaining consistent quality.
“XXXLutz’s growth story is a textbook example of how understanding local markets can fuel international success.” — Industry Analyst, European Retail Journal
Product Range: What Can You Find at XXXLutz?
Furniture Collections for Every Room
XXXLutz boasts an extensive product portfolio that caters to various home needs:
- Living Room: Sofas, recliners, coffee tables, TV units
- Dining Room: Tables, chairs, sideboards, bar stools
- Bedroom: Beds, wardrobes, mattresses, dressers
- Office: Desks, ergonomic chairs, storage units
- Outdoor: Patio furniture, garden accessories
Each category offers multiple styles from classic to contemporary, ensuring something for every taste.
Home Décor and Accessories
Beyond furniture, XXXLutz offers a broad assortment of décor items including lighting, rugs, curtains, and wall art. This comprehensive approach allows customers to furnish and decorate their homes under one roof.
Pricing Strategy and Affordability
One of the reasons XXXLutz appeals to a broad customer base is its competitive pricing. The company positions itself as a provider of affordable luxury — delivering premium-looking furniture at mid-range prices.
Sales, Discounts, and Financing Options
Regular sales and promotional events help customers get even better deals. Additionally, XXXLutz often provides financing options with flexible payment plans, making it easier to purchase higher-ticket items.
The retailer’s cost-effectiveness often surpasses smaller local stores and even some online-only furniture retailers, offering a blend of price, quality, and in-store experience that’s hard to beat.
Quality and Materials Used by XXXLutz
XXXLutz focuses on durability and material quality in its product lines. Most furniture items use solid wood, high-grade composites, or durable metals depending on the piece. Upholstery ranges from genuine leather to modern textiles with stain-resistant features.
Independent product testing agencies regularly review XXXLutz items, confirming their compliance with European quality and safety standards.
Shopping Experience at XXXLutz
In-Store Ambiance and Services
Visiting an XXXLutz store is designed to be inspiring and user-friendly. Spacious showrooms allow customers to visualize furniture in realistic settings. Knowledgeable sales staff provide personalized advice tailored to customers’ lifestyles and preferences.
Online Shopping and Delivery
The retailer’s website offers an extensive catalog with detailed product descriptions, reviews, and photos. Online ordering is seamless, with multiple delivery options including home delivery, assembly services, and pick-up points.
Sustainability and Corporate Responsibility
XXXLutz has taken active steps towards sustainability, including:
- Using responsibly sourced materials
- Reducing waste through improved packaging
- Implementing energy-efficient store designs
These efforts align with industry-wide standards and appeal to environmentally conscious consumers.
Comparison Table: XXXLutz vs Competitors
| Feature | XXXLutz | Competitor A | Competitor B | Competitor C |
|---|---|---|---|---|
| Cost | Mid-range, affordable | High-end, premium | Budget-friendly | Mid-range |
| Product Range | Extensive, all rooms | Focused on living rooms | Limited, mostly basics | Moderate, trendy |
| Quality | High compliance standards | Exceptional craftsmanship | Variable quality | Good quality |
| Ease of Use | User-friendly website & stores | Limited online options | Online only, easy | Mix of online & physical |
| Customer Service | Personalized in-store help | Premium concierge service | Basic support | Average service |
| Sustainability | Strong commitment | Moderate initiatives | Minimal efforts | Growing focus |
This table helps customers evaluate XXXLutz against other market options, emphasizing its balanced offerings in cost, quality, and service.
Customer Reviews and Testimonials
Across multiple review platforms, XXXLutz scores highly for product satisfaction and customer support. Buyers appreciate the durable build quality, variety of styles, and prompt delivery services.
“I furnished my entire living room with XXXLutz and couldn’t be happier. The mix of affordability and quality is unmatched.” — Verified Buyer
Tips for Getting the Best Deals at XXXLutz
- Subscribe to newsletters for exclusive offers
- Shop during seasonal sales like Black Friday or end-of-year clearance
- Visit stores to see showroom-only discounts
- Use financing plans wisely to spread out payments
Smart shoppers can maximize value without compromising on quality or style.
Conclusion:
Starting with the focus keyword, XXXLutz offers a comprehensive furniture shopping experience that combines quality, affordability, and style. Whether shopping online or visiting their vast showrooms, customers enjoy a wide selection tailored to many tastes and budgets. The company’s commitment to sustainability and excellent customer service further solidifies its position as a trusted furniture provider.
For those looking to refresh their homes with dependable and stylish furniture, XXXLutz stands out as a leading choice across Europe.
FAQ’s
What types of furniture does XXXLutz offer?
XXXLutz offers furniture for all major rooms including living rooms, bedrooms, dining rooms, offices, and outdoor areas, alongside a variety of home décor items.
Is XXXLutz affordable for budget shoppers?
Yes, XXXLutz provides mid-range pricing with frequent sales and financing options to accommodate various budgets.
Can I shop online with XXXLutz?
Absolutely. Their website features a comprehensive catalog, easy ordering process, and multiple delivery options.
Does XXXLutz focus on sustainability?
Yes, the company is committed to using sustainable materials, reducing waste, and energy-efficient store operations.
How is the quality of XXXLutz furniture?
XXXLutz furniture meets high European quality and safety standards, with many products tested for durability and materials.
Are there financing options available at XXXLutz?
Yes, flexible payment plans are offered to help customers manage larger purchases conveniently.
BUSINESS
Fid BKG SVC LLC MoneyLine: Financial Transaction Code
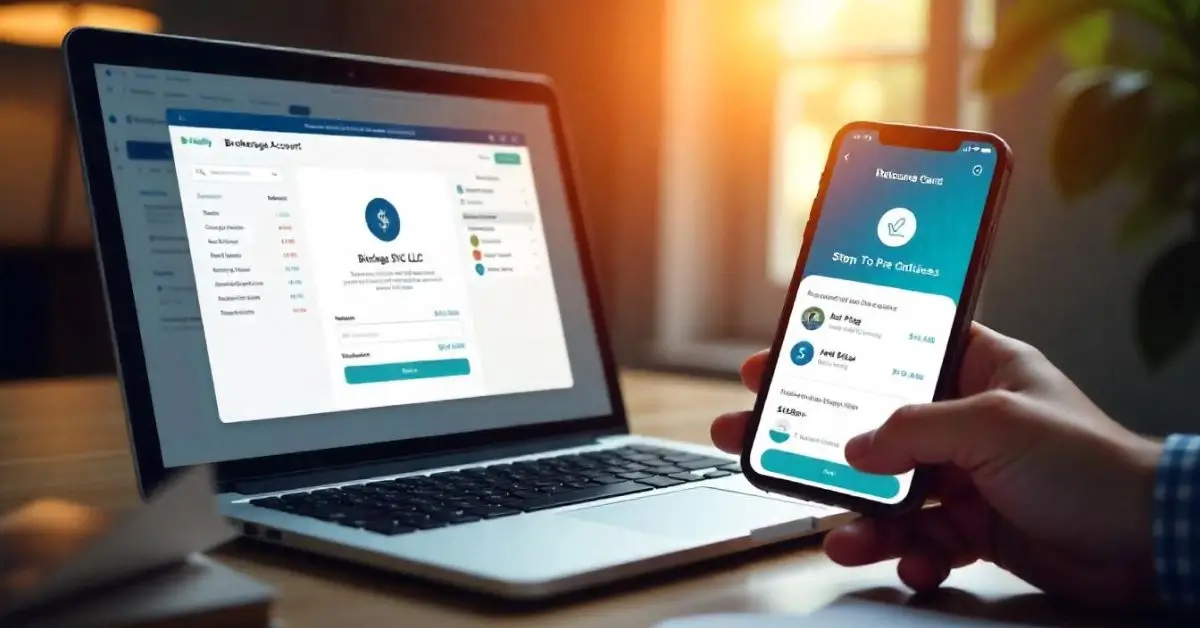
Fid BKG SVC LLC MoneyLine is a transaction descriptor you might encounter on your bank statement. It typically refers to automated fund transfers processed by Fidelity Brokerage Services, specifically for electronic payments, investment transactions, or contributions to brokerage or retirement accounts. Understanding this code is crucial if you are actively investing or managing your money through automated systems.
This transaction often appears when moving funds into or out of a Fidelity account, including services like MoneyLine—an automatic electronic transfer system. While this entry might confuse those unfamiliar with brokerage processes, it’s part of a secure and highly regulated system operated under standard financial protocols.
Why Does “Fid BKG SVC LLC MoneyLine” Appear on Your Bank Statement?
If you’ve set up automatic deposits or withdrawals with a financial institution such as Fidelity Investments, the transaction may show up as Fid BKG SVC LLC MoneyLine on your bank statement. These are typically ACH (Automated Clearing House) transactions, representing scheduled money movements like:
- Funding a brokerage or IRA account
- Transferring dividends or gains to a bank account
- Setting up automatic investments from your checking account
It is essential to note that this does not indicate unauthorized activity—as long as you recognize the financial relationship. However, if you don’t recall authorizing the transaction, contact your bank immediately for verification.
How Does the MoneyLine System Work?
MoneyLine is Fidelity’s automatic funding tool that simplifies recurring transactions. When customers enable this service, it automatically initiates electronic funds transfers on pre-selected dates. Here’s how the system works:
- Customer Authorization: You approve regular transfers via Fidelity’s online platform.
- Schedule Confirmation: You set the timing (weekly, bi-weekly, monthly).
- ACH Network Initiates Transfer: Money moves through the ACH clearing system under the descriptor “Fid BKG SVC LLC MoneyLine”.
- Settlement Finalization: Funds arrive within 1–3 business days.
This seamless process supports timely investments and eliminates manual transfers. It ensures that you’re not missing out on market opportunities due to delays.
Is Fid BKG SVC LLC MoneyLine Safe?
Yes, Fid BKG SVC LLC MoneyLine is a safe and trusted method of electronic fund transfer. The system adheres to all financial regulations under the Federal Reserve’s ACH compliance framework and is monitored under industry-standard cybersecurity protocols. Fidelity, as one of the largest financial institutions in the U.S., follows FINRA and SIPC guidelines to ensure funds and transactions are protected.
“Electronic transfers like MoneyLine are backed by institutional-grade encryption and multi-factor verification systems,” says an industry expert in digital finance.
Nevertheless, it’s always wise to regularly monitor your financial statements and verify any transactions you don’t recognize immediately.
Common Use Cases for Fid BKG SVC LLC MoneyLine
Understanding the variety of situations where this descriptor might appear is critical for personal financial awareness. Below are common use cases:
- IRA Contributions: Automatically funding a retirement account each month.
- Investment Accounts: Regular deposits into a brokerage account.
- Dividend Transfers: Receiving investment returns directly into your checking account.
- Money Market Sweeps: Moving funds to or from cash reserves based on market conditions.
- Rebalancing Strategies: Automatic portfolio adjustments triggering fund movements.
If you’re actively investing or saving for retirement, the Fid BKG SVC LLC MoneyLine will likely be a recurring sight on your bank statement.
Fid BKG SVC LLC MoneyLine vs Other Financial Transfer Descriptors
To better understand how Fid BKG SVC LLC MoneyLine stacks up against other transaction systems, here’s a comprehensive comparison table:
| Feature | Fid BKG SVC LLC MoneyLine | PayPal Transfers | Zelle Transactions | Venmo | Wire Transfers |
|---|---|---|---|---|---|
| Cost to Use | $0 (if linked to Fidelity) | Usually Free | Free (via banks) | Free | $15–$45 |
| Transfer Speed | 1–3 Business Days | Instant–1 Day | Minutes | Minutes | Same-Day |
| Ease of Use | Easy Setup via Fidelity | Very User-Friendly | App-Integrated | Social + App | Moderate (manual forms) |
| Security Level | High (Bank-grade, encrypted) | Moderate | High | Moderate | High |
| Regulatory Oversight | FINRA/SIPC Compliant | FinCEN Regulated | Regulated (banks) | Limited | Federal Reserve |
This table illustrates that while services like Zelle and Venmo offer faster transfers, Fid BKG SVC LLC MoneyLine is far superior for secure, scheduled, investment-linked transfers.
How to Manage or Cancel a MoneyLine Transfer
If you wish to pause, cancel, or adjust a MoneyLine transfer, follow these steps:
- Log into your Fidelity account.
- Navigate to “Transfers” → “Automatic Transfers.”
- Select the existing schedule and modify or cancel.
- Confirm the change through 2-step verification.
Keep in mind that changes may take 1–2 business days to reflect. Always plan in advance to avoid delayed investments or fund movement interruptions.
How to Verify Legitimacy of a Fid BKG SVC LLC MoneyLine Charge
You can easily verify if the transaction is legitimate:
- Check your Fidelity account activity.
- Match the amount and date with a scheduled transaction.
- Contact Fidelity’s customer service or your bank to cross-verify.
- Use mobile alerts or banking apps to track ACH activity in real-time.
If something seems suspicious, freeze the transaction temporarily, and investigate before proceeding. Remember, fraudulent activity using this descriptor is rare, but caution never hurts.
Regulatory Compliance and Transparency
Fidelity’s electronic fund transfers, including those through MoneyLine, are subject to:
- NACHA Rules (governing ACH transfers)
- FINRA regulations
- SEC reporting standards
- SIPC investor protections
This ensures that Fid BKG SVC LLC MoneyLine adheres to strict financial controls, offering investors peace of mind. Moreover, clients always retain control over their money movement preferences.
Transitioning to Digital Banking with Confidence
The increasing reliance on automated systems like MoneyLine reflects a broader trend toward digital banking and investment automation. Whether you’re contributing to a Roth IRA, sweeping funds between accounts, or building a DCA (Dollar-Cost Averaging) strategy, automated solutions such as Fid BKG SVC LLC MoneyLine offer unparalleled consistency.
“Automation isn’t just about ease—it’s about creating discipline in investing,” notes a certified financial planner.
For investors looking to make the most of every paycheck, setting up this feature is a smart move aligned with long-term financial growth.
Best Practices When Using Fid BKG SVC LLC MoneyLine
If you’re utilizing this system or planning to, here are some expert-recommended best practices:
- Set Transfer Limits: Avoid overdrafts by aligning transfers with income cycles.
- Enable Notifications: Activate alerts to track every initiated transaction.
- Review Statements Monthly: This helps detect errors early.
- Test with Small Transfers First: Especially when linking a new account.
- Consult a Financial Advisor: Before automating large-scale contributions.
These practices safeguard your finances while ensuring you fully leverage the benefits of automation.
Conclusion:
Fid BKG SVC LLC MoneyLine serves as a reliable bridge between your bank and investment accounts. It is an industry-standard solution for automating financial contributions with minimal risk and maximum convenience. Whether you are growing your retirement savings, setting up recurring deposits, or streamlining your investment process, this tool is tailored to fit seamlessly into your financial ecosystem.
With strong regulatory backing, easy controls, and consistent performance, Fid BKG SVC LLC MoneyLine is more than just a descriptor—it’s an essential part of modern financial management.
FAQ’s
What does Fid BKG SVC LLC MoneyLine mean on my bank statement?
It refers to an authorized electronic fund transfer related to Fidelity Investments, typically for brokerage or retirement account funding.
Is Fid BKG SVC LLC MoneyLine a scam or fraud?
No, it’s a legitimate transaction descriptor used by Fidelity. However, if you don’t recognize it, contact your bank or Fidelity for verification.
Can I cancel a MoneyLine transaction?
Yes, you can log into your Fidelity account and cancel or modify any MoneyLine transaction with a few simple steps.
How fast are Fid BKG SVC LLC MoneyLine transfers?
Transfers typically settle within 1 to 3 business days, depending on the ACH network’s timing and your bank’s processing.
Are there fees for using MoneyLine?
No, using Fid BKG SVC LLC MoneyLine through Fidelity-linked accounts is usually free of charge.
What should I do if I see an unrecognized transaction?
Immediately contact both your bank and Fidelity’s support team to investigate and, if necessary, reverse or dispute the transaction.
BUSINESS
Benefits of Professional Elder Care Placement Support

Are you feeling overwhelmed about finding the right care for your elderly loved one?
You’re not alone. Choosing the best option can be confusing and stressful. That’s where professional elder care placement support comes in. These experts help families make the right decision with less worry. They understand your needs and guide you every step of the way.
Let a professional help you find the best care solution today-reach out and get the support you deserve.
Expert Guidance
Finding the right care can be confusing. Elder care placement professionals understand the options available. They know the differences between assisted living, memory care, and nursing homes. Their advice helps families avoid costly mistakes.
With their knowledge, they match seniors to places that meet their needs. This ensures comfort, safety, and the right level of care. They also consider personal preferences and budget. Their help supports an independent lifestyle with supportive services.
Time Savings
Searching for the right senior care takes a lot of time. There are many options to compare, and it can get overwhelming. Elder care placement professionals do the research for you. They quickly narrow down the best choices based on your needs.
This saves families hours of phone calls and visits. You can focus on your loved one instead of paperwork and planning. With expert help, decisions are made faster and with more confidence. It makes the whole process easier and less stressful.
Personalized Matches
Every senior has unique needs and preferences. A care placement expert takes time to understand those details. They listen to what matters most-health, lifestyle, and budget. Then, they find care options that match those needs closely.
This personal approach helps families feel confident in their choice. Seniors are placed in communities where they can feel safe and comfortable. It leads to better care and a smoother transition. The right match can make a big difference in overall happiness and well-being.
Reduced Stress
Finding care for a loved one can feel overwhelming. There are so many options and decisions to make. A placement professional helps guide you through each step. Their support brings clarity and comfort during a stressful time.
With expert help, you don’t have to face the process alone. They handle the research and planning, which eases the pressure on families. This allows you to focus more on your loved one’s needs. It brings peace of mind and confidence in your choices.
Ongoing Support
Care needs can change over time. A placement professional doesn’t just help at the beginning. They stay available to offer guidance even after your loved one moves in. This continued support helps families adjust to new situations.
If problems come up, you have someone to call. They can help find solutions or recommend other care options. This gives you confidence as your loved one’s needs grow. You are never left to figure things out alone.
All About Professional Elder Care Placement Support
Choosing the right type of elder care is crucial for your loved one’s health, happiness, and dignity. With many years of experience in the field, professionals understand the nuances of different environments and can tailor their approach accordingly.
By opting for elder care placement support, you are choosing peace of mind and quality care for your family member.
Did you enjoy reading this article? If so, then be sure to check out the rest of our blog for more!

 Cartoon1 year ago
Unlocking the Potential of Nekopoi.care: A Comprehensive Guide

 Game1 year ago
Exploring Aopickleballthietke.com: Your Ultimate Pickleball Destination

 BUSINESS1 year ago
What Companies Are In The Consumer Services Field

 BUSINESS1 year ago
Unraveling the Mystery of 405 Howard Street San Francisco charge on Credit Card

 HOME IMPROVEMENT1 year ago
Vtrahe vs. Other Platforms: Which One Reigns Supreme?

 TECHNOLOGY1 year ago
The Guide to Using Anon Vault for Secure Data Storage

 ENTERTAINMENT11 months ago
Understanding Bunkr Album: A Comprehensive Guide

 ENTERTAINMENT1 year ago
The Epic Return: Revenge of the Iron-Blooded Sword Hound
